

2020年04月21日
サバゲー用旧日本軍手榴弾 Imperial Japanese Army grenades for airsoft
ドーモ、ジュリエットです!
これまで当兵器局では2つの柄付き手榴弾をリリースしました。
今回ご紹介するのは旧日本軍式の手榴弾になります。
まずはこちらの動画をご覧下さい。
Domo, it's Juliette!
So far, the Weapons Department has released two stick grenades.
The one we're going to introduce here is the imperial Japanese Army style grenade.
The first one can be seen in this video.
今回のグレネードは上部を叩くことにより撃発します。
もちろん、T238のタイマー機能はそのままなので撃発した後、一定時間後に起爆します。
それでは組み立て方を紹介します。
This time, the grenade is fired by hitting the top of the grenade.
Of course, the T238 has the same timer function as the T238, so the grenade will detonate after a certain time after firing.
Now, let's see how to assemble it.

必要なものは以下の通りです。
● T238グレネード
● 3Dプリンタパーツ
● 六角レンチ(サイズ2.5のもの。)
You will need the following.
T238 grenades.
3D printer parts
Hexagonal wrench (size 2.5)
それでは組み立ての入ります。
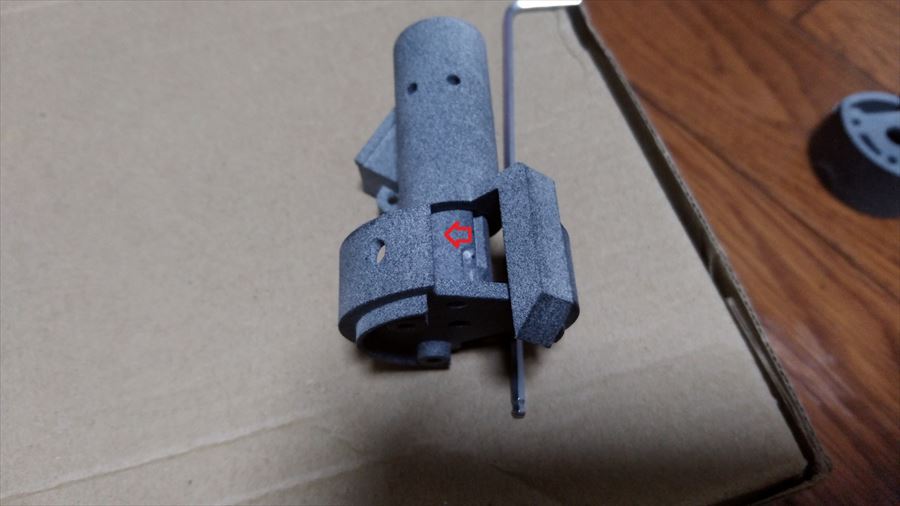
まずこの信管覆いパーツを上部パーツに取り付けます。
画像赤丸の信管覆いの内側ポッチと、上部パーツの溝をあわせます。
Now let's start the assembly.
First, attach the fuse cover to the upper part.
Match the inner potch of the fuse cover and the groove of the upper part.

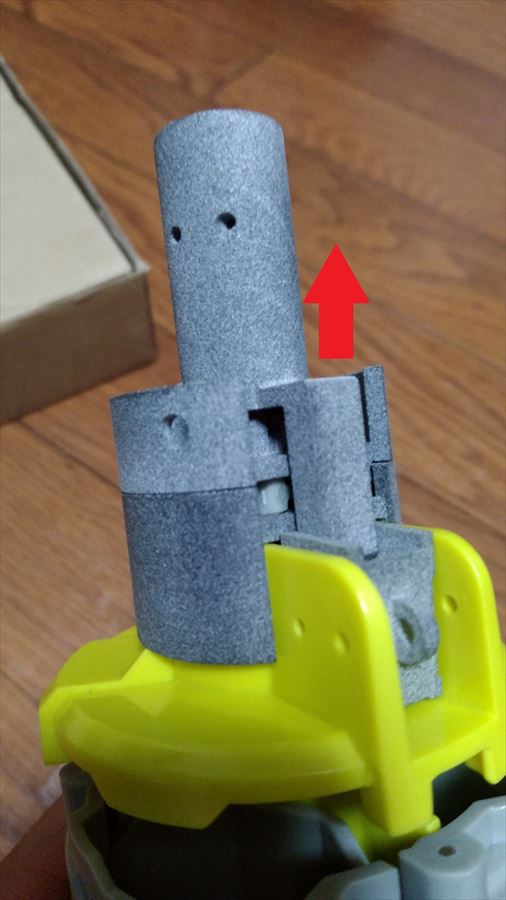
縦方向に押し込んだあと、上から見て時計回りに30°ほど回転させます。
※最初は固い場合があります。その場合は滑らかに動くまで何度か動かして下さい。
Push it in vertically and then rotate it clockwise by 30 degrees, looking from the top.
It may be hard at first. In this case, move it several times until it moves smoothly.
こんな感じで下まで下がるようになったら上部は完成です。
When you can get it down to the bottom like this, the top is complete.

つぎにT238グレネードを分解します。
一度起爆させたのち、上部を止めているボルト3つを外します。このボルトは後で使うので取っておいてください。
時間調整用のクリップ、その下の台座部分を取り外します。
次にポンチでレバーを取り外します。
Next, disassemble the T238 grenade.
After detonating the grenade, remove the 3 bolts holding the upper part of the grenade. Keep this bolt for later use.
Remove the time adjustment clip and the base part under it.
Next, remove the lever with a punch.

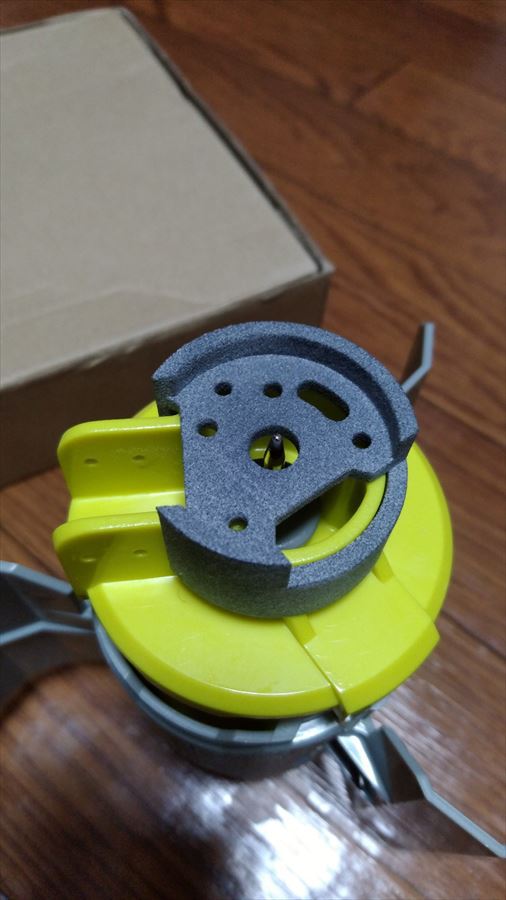
次に3Dプリンタパーツの下部を取り付けます。
Next, install the lower part of the 3D printer part.
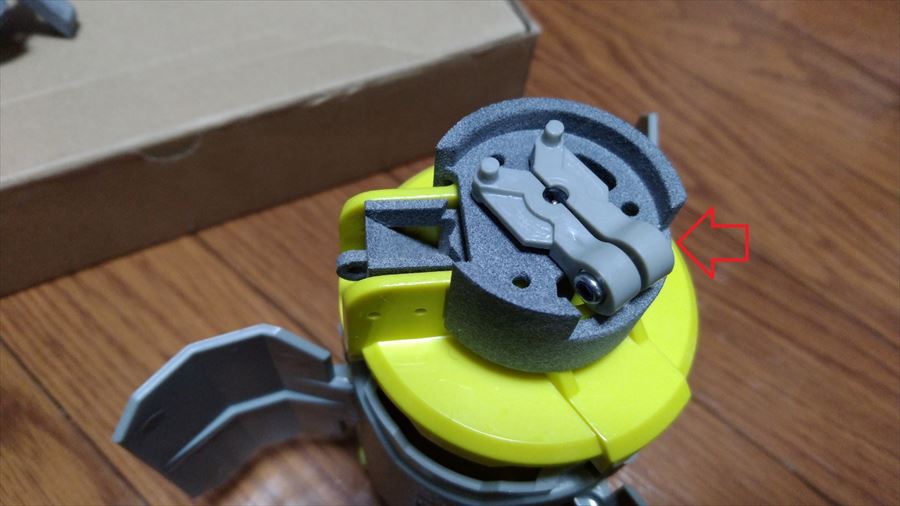
3Dプリンタパーツの安全装置と先ほど取り外したクリップを取り付けます。
クリップについては赤矢印側に六角ボルトの穴が来るようにしてください。
そうしないとあとから起爆時間の調整が出来なくなります。
Install the safety device of the 3D printer parts and the clip that was removed earlier.
As for the clip, make sure that the hole of the hexagon bolt is on the red arrow side.
Otherwise you will not be able to adjust the detonation time later.
次に上部パーツを取り付けて、先ほど外したボルトで固定します。
Next, install the top part and secure it with the bolts you just removed.

これで完成です。次に使い方について説明します。
羽根をたたんだ状態でそこから飛び出ているボルトを押し上げます。
(写真では撮影のためベルトで固定していますが、実際は手で握りながらで行えます)
Now you're done. Next, let me explain how to use it.
With the wings folded, push up the bolt.
(In the photo, it's fixed with a belt for the purpose of taking a picture, but you can actually do it while holding it by hand.)

この状態で、下の部分だけを羽に噛ませて、上の部分を60度ぐらいひねります。
そうすると上の部分に隙間が出来た状態で固定されますので、BB弾を入れることが出来ます
In this state, bite only the bottom part into the wings and twist the top part about 60 degrees.
Then the upper part will be fixed with a gap in the upper part, so you can put BB bullets into it.

BB弾を入れ終わったら、上部のパーツを引き上げます。
Once you've finished putting in the BB bullets, pull up the top part.
その後、再度T238の上部を60度くらい回して、上下を抑え、下から飛び出たボルトを押し上げつつ、安全装置を押し込んで噛ませます。
Then turn the top of the T238 again about 60 degrees to hold the top and bottom down and push the safety in and engage the safety while pushing up the bolt that pops out from underneath.

これで準備は完了です。
あとは安全ピンを差し込むことでより安全に携行することが出来ます。
The preparation is now complete.
Now you can carry it more safely by inserting the safety pin.

よりリアルに仕上げたい人は直径2mmの真鍮線等を加工して安全ピンを自作することをおススメします。
真鍮線についてはこちらが安くていいと思います。
https://www.yodobashi.com/product/100000001003778213/
If you want to make it more realistic, we recommend you to make your own safety pin by processing 2mm diameter brass wire or the like.
黒で塗ってガンダムマーカーのゴールドで塗って、真鍮線で安全ピンつけた図がこれです。
日本軍装備は持ってないので中途半端で申し訳ないですが・・・
Here's a picture of it painted in black and painted in gold, with a safety pin attached with brass wire.
I don't have any Japanese military equipment, so I apologize for the halfway point...

起爆方法についてはツイートの動画の通りです。
販売についてはラクマ、メルカリに不定期に出品します。
ラクマ
https://fril.jp/shop/js_hardware
メルカリ
https://www.mercari.com/jp/u/620228204/
確実に入手したい方は私のツイッターまでDM下さい。
★トラブルシューティング★
1 安全装置のリングについて
落下防止用に糸をつけるために作成したが、実際のところ特に意味はありません。
2 その他
M24柄付き手榴弾の記事を参照ください。
https://jshardware.militaryblog.jp/e1019823.html
これまで当兵器局では2つの柄付き手榴弾をリリースしました。
今回ご紹介するのは旧日本軍式の手榴弾になります。
まずはこちらの動画をご覧下さい。
Domo, it's Juliette!
So far, the Weapons Department has released two stick grenades.
The one we're going to introduce here is the imperial Japanese Army style grenade.
The first one can be seen in this video.
今回のグレネードは上部を叩くことにより撃発します。
もちろん、T238のタイマー機能はそのままなので撃発した後、一定時間後に起爆します。
それでは組み立て方を紹介します。
This time, the grenade is fired by hitting the top of the grenade.
Of course, the T238 has the same timer function as the T238, so the grenade will detonate after a certain time after firing.
Now, let's see how to assemble it.

必要なものは以下の通りです。
● T238グレネード
● 3Dプリンタパーツ
● 六角レンチ(サイズ2.5のもの。)
You will need the following.
T238 grenades.
3D printer parts
Hexagonal wrench (size 2.5)
それでは組み立ての入ります。
まずこの信管覆いパーツを上部パーツに取り付けます。
画像赤丸の信管覆いの内側ポッチと、上部パーツの溝をあわせます。
Now let's start the assembly.
First, attach the fuse cover to the upper part.
Match the inner potch of the fuse cover and the groove of the upper part.

縦方向に押し込んだあと、上から見て時計回りに30°ほど回転させます。
※最初は固い場合があります。その場合は滑らかに動くまで何度か動かして下さい。
Push it in vertically and then rotate it clockwise by 30 degrees, looking from the top.
It may be hard at first. In this case, move it several times until it moves smoothly.

こんな感じで下まで下がるようになったら上部は完成です。
When you can get it down to the bottom like this, the top is complete.

つぎにT238グレネードを分解します。
一度起爆させたのち、上部を止めているボルト3つを外します。このボルトは後で使うので取っておいてください。
時間調整用のクリップ、その下の台座部分を取り外します。
次にポンチでレバーを取り外します。
Next, disassemble the T238 grenade.
After detonating the grenade, remove the 3 bolts holding the upper part of the grenade. Keep this bolt for later use.
Remove the time adjustment clip and the base part under it.
Next, remove the lever with a punch.

次に3Dプリンタパーツの下部を取り付けます。
Next, install the lower part of the 3D printer part.

3Dプリンタパーツの安全装置と先ほど取り外したクリップを取り付けます。
クリップについては赤矢印側に六角ボルトの穴が来るようにしてください。
そうしないとあとから起爆時間の調整が出来なくなります。
Install the safety device of the 3D printer parts and the clip that was removed earlier.
As for the clip, make sure that the hole of the hexagon bolt is on the red arrow side.
Otherwise you will not be able to adjust the detonation time later.

次に上部パーツを取り付けて、先ほど外したボルトで固定します。
Next, install the top part and secure it with the bolts you just removed.

これで完成です。次に使い方について説明します。
羽根をたたんだ状態でそこから飛び出ているボルトを押し上げます。
(写真では撮影のためベルトで固定していますが、実際は手で握りながらで行えます)
Now you're done. Next, let me explain how to use it.
With the wings folded, push up the bolt.
(In the photo, it's fixed with a belt for the purpose of taking a picture, but you can actually do it while holding it by hand.)

この状態で、下の部分だけを羽に噛ませて、上の部分を60度ぐらいひねります。
そうすると上の部分に隙間が出来た状態で固定されますので、BB弾を入れることが出来ます
In this state, bite only the bottom part into the wings and twist the top part about 60 degrees.
Then the upper part will be fixed with a gap in the upper part, so you can put BB bullets into it.

BB弾を入れ終わったら、上部のパーツを引き上げます。
Once you've finished putting in the BB bullets, pull up the top part.

その後、再度T238の上部を60度くらい回して、上下を抑え、下から飛び出たボルトを押し上げつつ、安全装置を押し込んで噛ませます。
Then turn the top of the T238 again about 60 degrees to hold the top and bottom down and push the safety in and engage the safety while pushing up the bolt that pops out from underneath.

これで準備は完了です。
あとは安全ピンを差し込むことでより安全に携行することが出来ます。
The preparation is now complete.
Now you can carry it more safely by inserting the safety pin.

よりリアルに仕上げたい人は直径2mmの真鍮線等を加工して安全ピンを自作することをおススメします。
真鍮線についてはこちらが安くていいと思います。
https://www.yodobashi.com/product/100000001003778213/
If you want to make it more realistic, we recommend you to make your own safety pin by processing 2mm diameter brass wire or the like.
黒で塗ってガンダムマーカーのゴールドで塗って、真鍮線で安全ピンつけた図がこれです。
日本軍装備は持ってないので中途半端で申し訳ないですが・・・
Here's a picture of it painted in black and painted in gold, with a safety pin attached with brass wire.
I don't have any Japanese military equipment, so I apologize for the halfway point...

起爆方法についてはツイートの動画の通りです。
販売についてはラクマ、メルカリに不定期に出品します。
ラクマ
https://fril.jp/shop/js_hardware
メルカリ
https://www.mercari.com/jp/u/620228204/
確実に入手したい方は私のツイッターまでDM下さい。
★トラブルシューティング★
1 安全装置のリングについて
落下防止用に糸をつけるために作成したが、実際のところ特に意味はありません。
2 その他
M24柄付き手榴弾の記事を参照ください。
https://jshardware.militaryblog.jp/e1019823.html
2020年04月06日
G&G MG42用拡張ストック基部 Extended stock base for G&G MG42
ドーモ、ジュリエットです!
今回紹介するのはG&G M42用の拡張ストック基部です。
G&GのMG42は分厚いスチール製のボディでバレル交換を可能にした点でM42のトイガン界におけるフラグシップモデルの地位にあります。
しかし実はストック基部のデザインが悪く、直径が33mmしかなく、奥行きもないため使えるバッテリーが限られます。
私の調べではバトン製のこちらのバッテリーが一番容量&放電性能が優れています。
7.4v 2000mAh 45C-30C
https://www.gunsmithbaton.com/products/detail/1220
このバッテリーの寸法は31mm×16mm×98mmです。
入れた感じはこんな感じ。
This is the stock base for the MG42 made by G&G.We are going to introduce the extended stock base for the G&G M42.
G&G's MG42 is the toy gun of the M42 in that it has a thick steel body that allows the barrel to be replaced It is the flagship model in the world.
In fact, however, the design of the base of the stock is not good, the diameter is only 33mm and it is not deep enough to be used. The battery is limited.
The image below shows a 31mm x 16mm x 98mm battery in it.

ちなみにこっちの黒いほうは入らないので注意してください。
https://www.gunsmithbaton.com/products/detail/1747
普通のMG42ならこれで十分なのですが、私のMG42はやまぎょさんのハイサイ33カスタムが組みこまれています。
そのためこのバッテリーでは放電性能が足らず、25rps位しか出ません。
33rpsを出すためにはより放電性能が高いこのバッテリーを入れる必要があります。
http://kypom-battery.com/product.php?mod=detail&id=13&url=
This is good enough for a normal MG42, but my MG42 is custom and has a high rate of fire. It is.
So this battery does not have enough discharge performance and only produces about 25rps.
To get 33rps, you need to install this battery which has higher discharge performance.
http://kypom-battery.com/product.php?mod=detail&id=13&url=
ただ、このバッテリーのサイズは34mm×18mm×103mmであり、純正の基部では入れることが出来ないのです。
そのため作ったのがこちらです。
However, the size of this battery is 34mm x 18mm x 103mm and you can put it in at the base of the stock You can't do that.
That's why we made this one.

こちらはPA12GBで作られているため強度は十分です。
写真のパーツは一度フィールドに投入しております。細かい傷などはその際についたものです。
私はアタッカー寄りなので前線でガンガン使いましたが、壊れたりガタつくことはありませんでした。
先ほどのバッテリーもばっちり入ります。
This one is made of 12GB PA and is strong enough.
The parts in the photo have been fielded once. The small scratches and so on are the ones that were made during that time.
I am an attacker, so I used this gun in the front line, but it does not break or rattle. The battery I mentioned earlier also fits nicely.
The battery I just mentioned goes in perfectly.

中はこんな感じでリブを入れて強度を確保しつつバッテリーを入れるスペースを確保しています。
The inside is ribbed like this to keep it strong and to make room for the battery.

黒で塗装することでオリジナルに近づきますが、塗装せずに組み込んだ場合はこんな感じです。
(銃本体がさびているのは見逃してください!)
Painting it in black will bring it closer to the original, but this is what it looks like when it's built in without painting.
(Miss the rusted body of the gun!)

また純正に付いているこちらの金具類やウッドストックもそのまま取り付け可能です。
ただPA12GBで作られたネジ穴にはそこまで強度がないため、M3とM4の角ナットとネジで挟むことでより強固に固定できます。
It is also possible to install the stock hardware and wooden-stock.
However, since the threaded holes made from PA12GB are not that strong, we have to use M3 and M4 square nuts and screws. You can fix it more firmly by clamping it with
●M3角ナット(M3 square nut)
https://www.monotaro.com/p/4211/4186/
●M3六角穴付きボタンボルト(M3 bolt)
https://www.monotaro.com/p/4149/5142/
●M4角ナット(M4 square nut)
https://www.monotaro.com/p/4211/4195/
●M4マイナスネジ(M4 minus bolt)
https://www.monotaro.com/p/4174/6126/
こんな感じで固定できます。
You can fix it like this.


こちらで販売中ですのでMG42のバッテリー選びで悩んでいた方はご検討下さい。
https://js-hardware.booth.pm/items/2194249
It's on sale here, so if you're having trouble choosing a battery for your MG42, please consider it.
http://shpws.me/S7f6
2020年04月04日
サバゲー用M24柄付手榴弾(GR02) M24 Stick Grenades for Air-Soft(GR02))
ドーモ、ジュリエットです。
まず最初にこちらの動画をご覧ください。
T238の時限式に引き続き、GR02を使用した、インパクト式の柄付き手榴弾を作成しました。
では購入者様向け組み立て方の説明に入ります。
組み立て方についてはイワ師さん(@820tarou820siw)からの情報を活用させていただいております。
★注意★
塗装後に撮った写真と未塗装の写真が入り混じっています。
柄の形状が煙幕手榴弾型とM24型入り混じっています。
組み立てに際して特に問題はないので、脳内補完していただくようお願いします。
【用意するもの】
用意していただくのはこんな感じです。

左から
・ ハンマー&ピンポンチ(細い+ドライバー等でも可)
・ たこ糸等(丈夫なものの方がいいです。)
・ P6サイズのOリング×2
・ M3×20mmの六角穴付きボルト(注 写真は15mmの付属のネジです。これだと長さが足りず分解します。)
・ 3Dプリンタパーツ
・ GR02グレネード
・ 柄(外径34cm長さ28cmで内径1.5cm以上のパイプ、マイクロエース社のコンバットセットでも可)
以下画像に入れ忘れた物
・ 六角レンチ
・ 3Dプリンタ製ボトル缶接続部
・ ボトル缶キャップ
・ 握り玉
【安全装置の組み立てと調整】
まず安全装置の強さを調整します。
写真のように棒状の安全装置にOリングとたこ紐を取り付けます。

紐の長さは柄に対してこれくらいです。紐は必ずわっか状にしてください。
安全装置への取り付けは写真のようにリングに通してもいいですし・・・・

写真のように取り付けてもどちらでもいいです。

この状態でまずネジ穴がある、GR02側の3Dプリンタパーツに差し込みます。

次に柄側の3Dプリンタパーツをねじ込んで合体させます。

下から見るとこんな感じで、Oリングが見えるのが正しい状態です。

この状態で紐を引っ張り、抜ける強さを確かめます。
3Dプリンタ特有のざらつきがあるため、最初は固く、紐がちぎれることもあるかもしれません。
何度か抜き差しするか、それでもダメな場合は図の赤丸部分を少しずつカッター等で削ることで調整してください。
また、Oリングの数を減らすことでも調整できます。

【弾頭部の組み立て】
引き抜き強さの調整が終わったらGR02本体に組付けていきます。
まず、ピンポンチでレバーの軸を取り除きます。

次にGR02の本体についている3つのネジを外し、付属のM3×20mmのネジで止めていきます。

安全装置を取り付けてみて、ちゃんと起爆球が固定されていることを確認します。
赤丸のように起爆球の上のポッチが安全装置で見えなくなり、これで安定していれば大丈夫です。

【柄の組み立て】
次に柄に柄接続部パーツを取り付けます。
きつい場合は柄をやすりで削って調整してください。
柄との固定については木ネジを使うか、両面テープを柄に巻いてねじ込んでください。
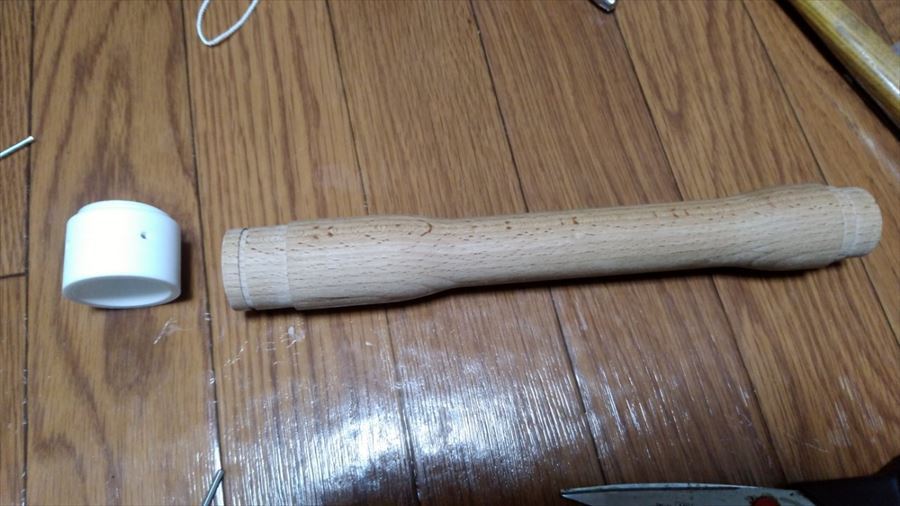

柄の反対側に、ボトル缶キャップとの接続パーツを取り付けます。
こちらも木ネジか両面テープ等で固定してください。

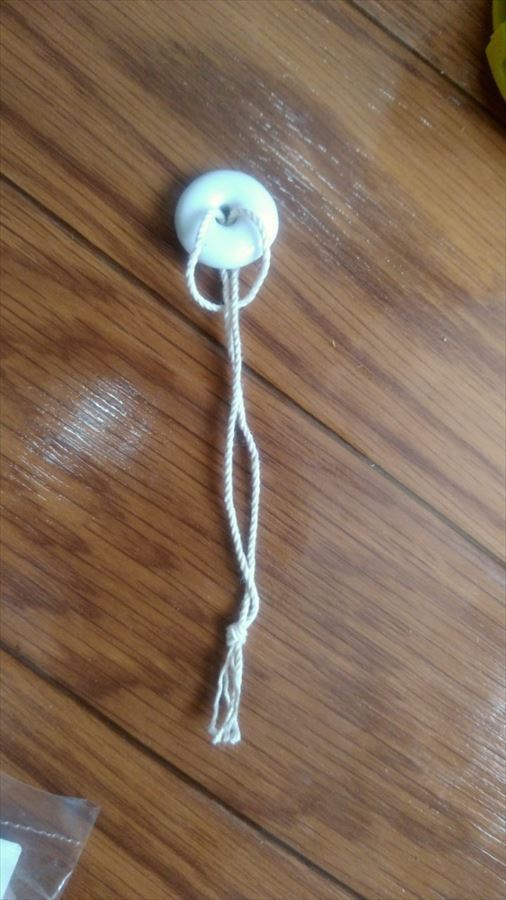
【握り玉の組み立て】
握り玉に紐を取り付けます。
どのようなつけ方でもいいですが、紐がリング状になるようにしてください。
【柄への紐通し】
次に柄に紐を通していきます。
クリーニングロッドを使ってもいいですが、ここでは使わない場合のやり方を紹介します。
まず、柄の穴に安全装置の紐を入れていきます。
適当にぐいぐい押し込んでもらって結構です。

次にこの穴に口を近づけて勢い良く息を吹き込みます。
(画像では口をつける代わりにブロワーで表しています)

その勢いで底から紐が出てくるはずです。
上手くいかない場合は、もう一度息を吹き込むか、一度紐を引き上げて、再度入れなおしてください。

【握り玉の取り付け】
本体から出てきた紐に握り玉のわっかを取り付けます。

こんな感じになります。

【弾頭部の取り付け】
弾頭部を柄にねじ込みます。

画像は省略しますが、あとはボトル缶キャップでふたをしたら完成です。
★販売について★
Boothにて販売しております。
GR02も入ったフルセットのほか、既にGR02をお持ちで柄付き手榴弾にしたい方用のセットもあります。
よろしければご覧ください。
https://js-hardware.booth.pm/items/2587666
まず最初にこちらの動画をご覧ください。
T238の時限式に引き続き、GR02を使用した、インパクト式の柄付き手榴弾を作成しました。
では購入者様向け組み立て方の説明に入ります。
組み立て方についてはイワ師さん(@820tarou820siw)からの情報を活用させていただいております。
★注意★
塗装後に撮った写真と未塗装の写真が入り混じっています。
柄の形状が煙幕手榴弾型とM24型入り混じっています。
組み立てに際して特に問題はないので、脳内補完していただくようお願いします。
【用意するもの】
用意していただくのはこんな感じです。

左から
・ ハンマー&ピンポンチ(細い+ドライバー等でも可)
・ たこ糸等(丈夫なものの方がいいです。)
・ P6サイズのOリング×2
・ M3×20mmの六角穴付きボルト(注 写真は15mmの付属のネジです。これだと長さが足りず分解します。)
・ 3Dプリンタパーツ
・ GR02グレネード
・ 柄(外径34cm長さ28cmで内径1.5cm以上のパイプ、マイクロエース社のコンバットセットでも可)
以下画像に入れ忘れた物
・ 六角レンチ
・ 3Dプリンタ製ボトル缶接続部
・ ボトル缶キャップ
・ 握り玉
【安全装置の組み立てと調整】
まず安全装置の強さを調整します。
写真のように棒状の安全装置にOリングとたこ紐を取り付けます。

紐の長さは柄に対してこれくらいです。紐は必ずわっか状にしてください。
安全装置への取り付けは写真のようにリングに通してもいいですし・・・・

写真のように取り付けてもどちらでもいいです。

この状態でまずネジ穴がある、GR02側の3Dプリンタパーツに差し込みます。

次に柄側の3Dプリンタパーツをねじ込んで合体させます。

下から見るとこんな感じで、Oリングが見えるのが正しい状態です。

この状態で紐を引っ張り、抜ける強さを確かめます。
3Dプリンタ特有のざらつきがあるため、最初は固く、紐がちぎれることもあるかもしれません。
何度か抜き差しするか、それでもダメな場合は図の赤丸部分を少しずつカッター等で削ることで調整してください。
また、Oリングの数を減らすことでも調整できます。

【弾頭部の組み立て】
引き抜き強さの調整が終わったらGR02本体に組付けていきます。
まず、ピンポンチでレバーの軸を取り除きます。

次にGR02の本体についている3つのネジを外し、付属のM3×20mmのネジで止めていきます。

安全装置を取り付けてみて、ちゃんと起爆球が固定されていることを確認します。
赤丸のように起爆球の上のポッチが安全装置で見えなくなり、これで安定していれば大丈夫です。

【柄の組み立て】
次に柄に柄接続部パーツを取り付けます。
きつい場合は柄をやすりで削って調整してください。
柄との固定については木ネジを使うか、両面テープを柄に巻いてねじ込んでください。


柄の反対側に、ボトル缶キャップとの接続パーツを取り付けます。
こちらも木ネジか両面テープ等で固定してください。

【握り玉の組み立て】
握り玉に紐を取り付けます。
どのようなつけ方でもいいですが、紐がリング状になるようにしてください。

【柄への紐通し】
次に柄に紐を通していきます。
クリーニングロッドを使ってもいいですが、ここでは使わない場合のやり方を紹介します。
まず、柄の穴に安全装置の紐を入れていきます。
適当にぐいぐい押し込んでもらって結構です。

次にこの穴に口を近づけて勢い良く息を吹き込みます。
(画像では口をつける代わりにブロワーで表しています)

その勢いで底から紐が出てくるはずです。
上手くいかない場合は、もう一度息を吹き込むか、一度紐を引き上げて、再度入れなおしてください。

【握り玉の取り付け】
本体から出てきた紐に握り玉のわっかを取り付けます。

こんな感じになります。

【弾頭部の取り付け】
弾頭部を柄にねじ込みます。

画像は省略しますが、あとはボトル缶キャップでふたをしたら完成です。
★販売について★
Boothにて販売しております。
GR02も入ったフルセットのほか、既にGR02をお持ちで柄付き手榴弾にしたい方用のセットもあります。
よろしければご覧ください。
https://js-hardware.booth.pm/items/2587666